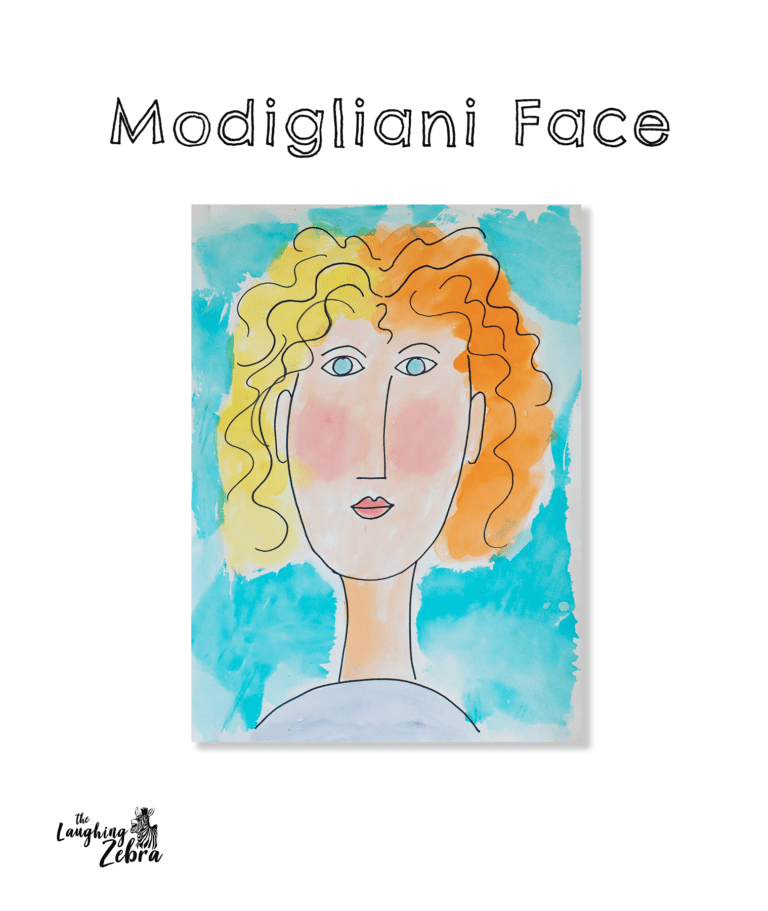
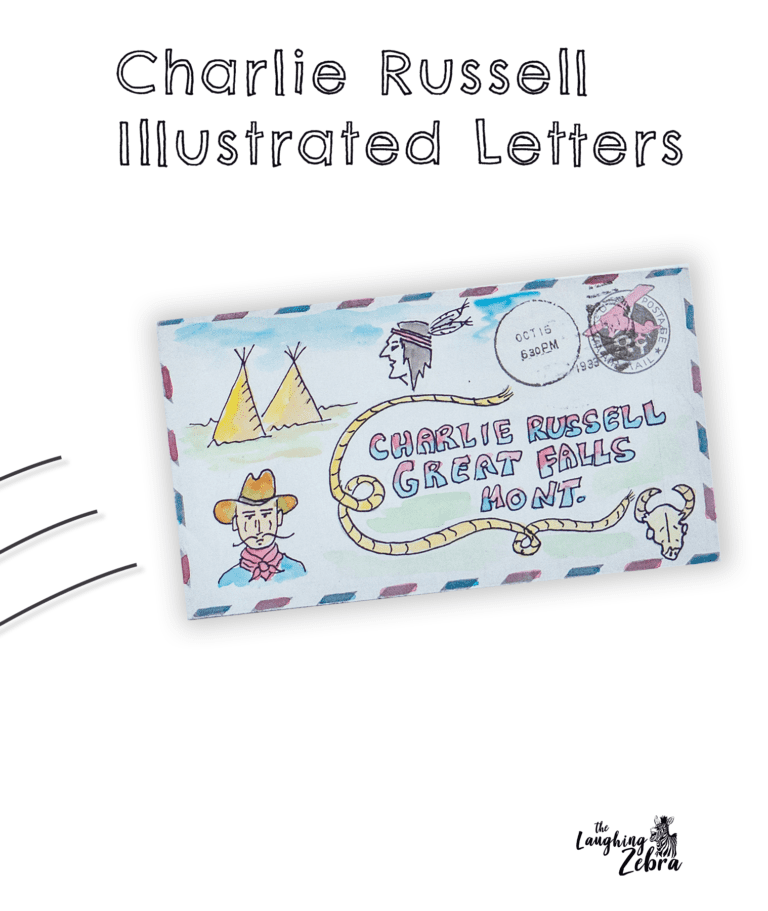
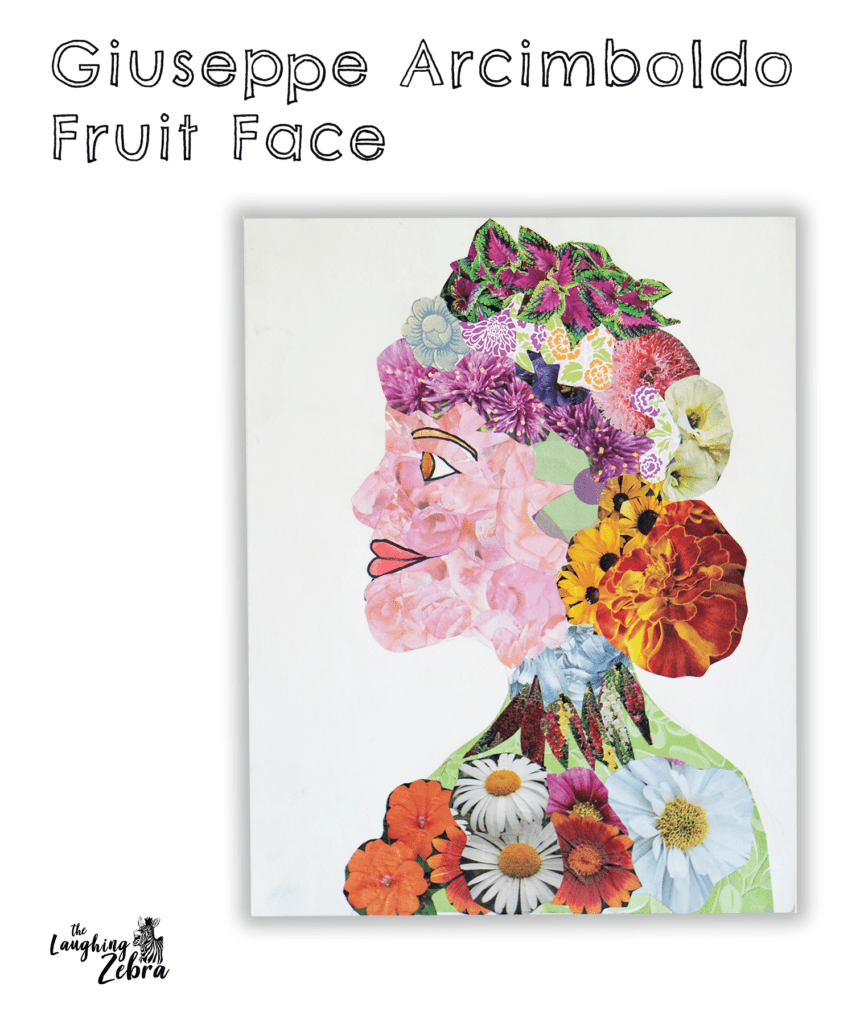
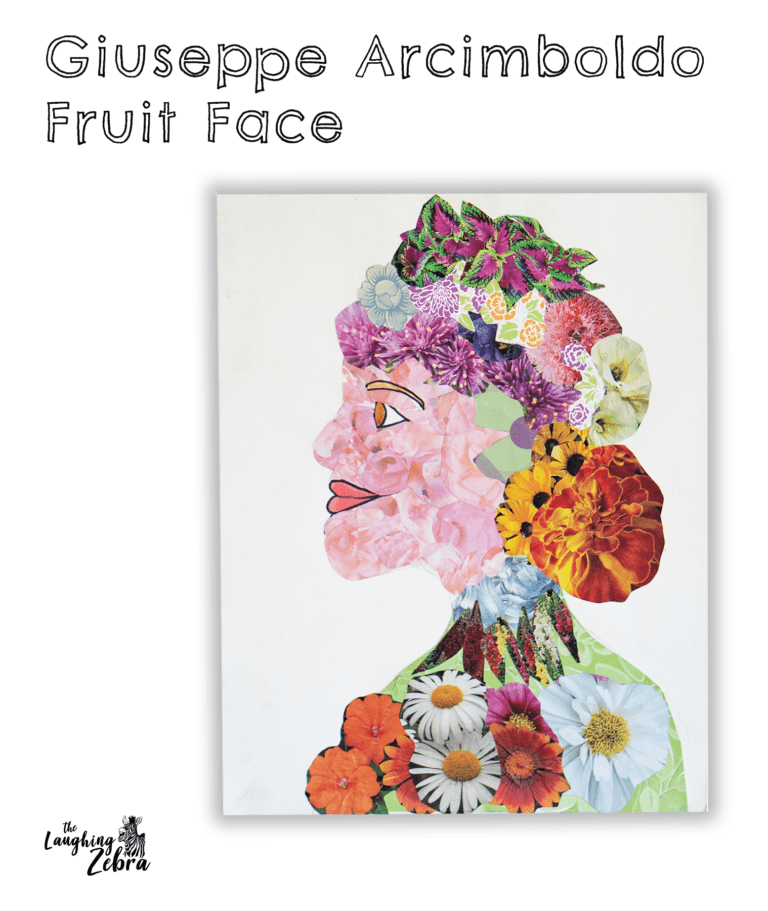
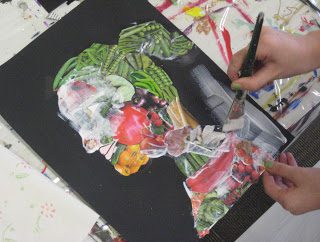
The Laughing Zebra

face

Modigliani Tissue Paper Face Project

This page contains affiliate links and I may receive a commission for purchases made through these links. Everything on this page I have used and heartily recommend for teaching art.

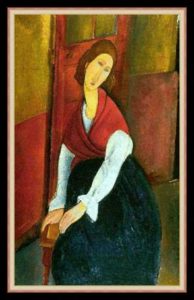
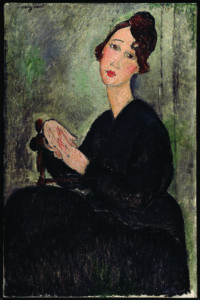
Amedeo Clemente Modigliani (July 12, 1884 – January 24, 1920) was an Italian artist who worked mainly in France. If you are not familiar with this artist he was famous for his paintings of elongated faces with long skinny necks. His drawings were simple and stylized. This is a fun lesson to do with all ages, and I have added the tissue paper background for an extra twist, since the face 

painting can be a fairly quick project to do.

How To:

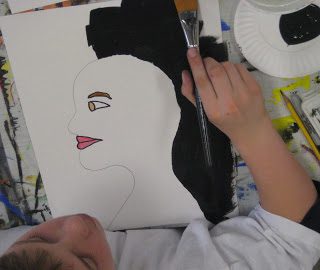
  1. I begin this lesson by showing some of Modigliani’s portraits. I talk about the long skinny faces and necks, and the almond shaped eyes,simple nose, and small rosebud lips.
  2. Starting with a big skinny U shape, I have the students practice a simple face drawing in this style following my steps as I do it on a whiteboard. For fun I have them do simple curly lines for the hair. If I have already done a portrait lesson with them I point out the difference between a more realistic portrait; the shape and size of the features, and the placement of them compared to Modigliani’s faces.
  3. Next I have them do a large drawing of the face on the watercolor paper, filling up most of the space. After they have done it in pencil, I have them go over all the lines with Sharpie.
  4. Then we watercolor the faces. I let them have some freedom with the hair, making it two-tone if they want, and just painting it loosely around their Sharpie lines.
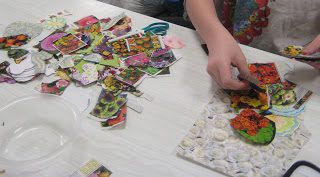
  5. After they have done the painting part then we use small pieces of tissue paper to fill in the background putting water under and over each piece with a brush and overlapping them.
  6. When the tissue dries we pull that off, and you end up with a textured looking background.

Let me know in the comments if you have any questions and please refer people back to this site if you use this lesson! 🙂

I'm writing a book!

I am excited to announce my latest project!  My daughter and I are working on a big, beautiful, creatively designed book on artist related lessons (similar to the ones on this website but with more details, step by step instructions and photos). The book will be for anyone who wants concise, detailed, well laid out lessons that are ready to teach, in a format that is fun to look at as well.

Book Info

This lesson is based on the amazing art of Giuseppe Arcimboldo. If you have never seen any of his work you need to look him up. I used Arcimboldo by Taschen and Hello Fruit Face! to start off this lesson. There are lots of great photos of his art.

To have the best resources for this project, get your name on the mailing lists for some vegetable/fruit seed catalogs and some flower seed catalogs. You can also use floral scrapbooking paper clip magazine pictures, but you need a lot so I don’t recommend this. Depending on what age you are doing this lesson for you may want to pre-cut some flowers and fruits and vegetables. 

I have the kids trace my pattern piece of the head onto their poster board. Then they draw in the lips, eyebrow, and eye with pencil, and paint these in with watercolors. Then I have them outline the head and facial features with sharpie.Next they paint the space around the heads with black acrylic paint (or leave this white, see last step).

Next step is to decide whether they are doing a man or woman and a fruit/vegetable face or a flower face. Then they need to choose their pictures-getting different sizes and types.

They mod podge them onto the head going around the facial features. You can either leave the heads on the same paper or have the students cut around the heads and glue, using rubber cement on a black piece of poster board.

New step by step Arcimboldo lesson in my upcoming book. Click here to see more information on my book and subscribe for book updates!

Please refer people back to this site if you use this lesson! 🙂